AVR Tutorial for writing a program in C
This AVR Tutorial guides step by step to the first running C programm on your AVR microcontroller.
|
Introduction |
|
|
It's not difficult to make a program running on an AVR microcontroller. If you have all the needed equipment ready, it is possible to learn how to work with an ATmega8 within one evening. This tutorial guides you step by step to find the shortest way to your first working program. We start with the required hardware. Then we install the AVR studio and the AVR GCC compiler (both are free). Then, after getting the most important datasheets, we write our first little program and make it running on an ATmega8. |
|
|
Click on the picture in this tutorial to watch them larger in a popup window. |
|
|
Schtepp 1: Required Hardware
Bevore we start you should get the following material: |
|
|
Computer
Of course we need a computer to program our AVR. It doesn't have to be a powerful machine. Personally,
I use an old portable computer with Windows XP. If your machine has a serial port it makes your life a little
easier because you don't need an USB to serial adapter. The STK500 developmentboard which we use in this tutorial,
requires a computer with serial interface or a USB to serial adapter.
|
|
|
USB to RS232 Adapter If your computer doesn't have a serial port, you need an USB to serial adapter to load your program on the microcontroller. I've made good experiences with the adapter UC232A manifactured by Aten. |
|
AVR development board STK500 In this tutorial we use the STK500 development board of ATMEL. It's not the cheapest solution but probably the fastest. Because it's made by ATMEL the compatibility to the microcontroller is guaranteed and by using this board, we can be optimistic that we will have no troubles with any kind of wrong wiring or any other possible error sources. A RS232 cable is delivered with the board. |
|
Power supply Unfortunately, the STK500 is delivered without power adapter. In the delivery scope is only a cable with the DC Connector and two bare ended wires. So you need a 12V power adapter. The best solution is of course an adjustable laboratory power supply. |
|
AVR Microcontroller ATmega8 This tutorial is written for working with the ATmega8. Tough it could be written for any other AVR uC. Because there is no "best AVR". Every AVR has its own specific attributes and features. It depends on the application, which type you use. But the ATmega8 is a nice and simple allrounder which can be used for many projects. It contains the basic peripherals and is probably the microcontroller which is most used in hobby electronics. It's always good to having a few spare controllers in your drawer. I recommend to having three to five pieces ready. Because everybody gets to a point somewhen where he wants to check if there is a buc in the code or if the controller has been broken. |
|
Step 2: Download and install the required software
|
|
|
AVR Studio
On Atmels website you can download the "AVR studio 4". Though version 5 and 6 have been released years ago I recommend AVR studio 4 for the following reasons:
|
|
|
|
|
|
AVR Toolchain
The AVR Toolchain is necessary to compile to c code. It can be downloaded free from the Atmel website.
|
|
ATmega8 Datasheet
Enter "ATmega8" at google. The datasheet will usually be the first search match. Or download it form:
Atmel.
|
|
Step 3: set up STK-500
|
|
|
Now we set up the STK500
|
|
|
|
|
|
Set the jumpers
|
|
|
|
|
|
Step 4: Create a new project in AVR Studio
|
|
|
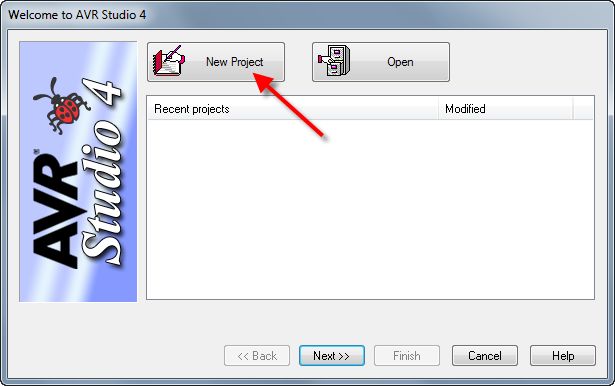
After you run the program, the welcom window appears. To create a new project, you just click on the button New Project .
|
|
|
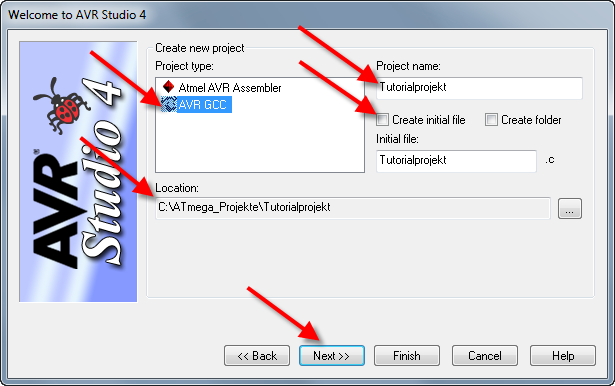
In the dialogue, do the following steps:
|
|
|
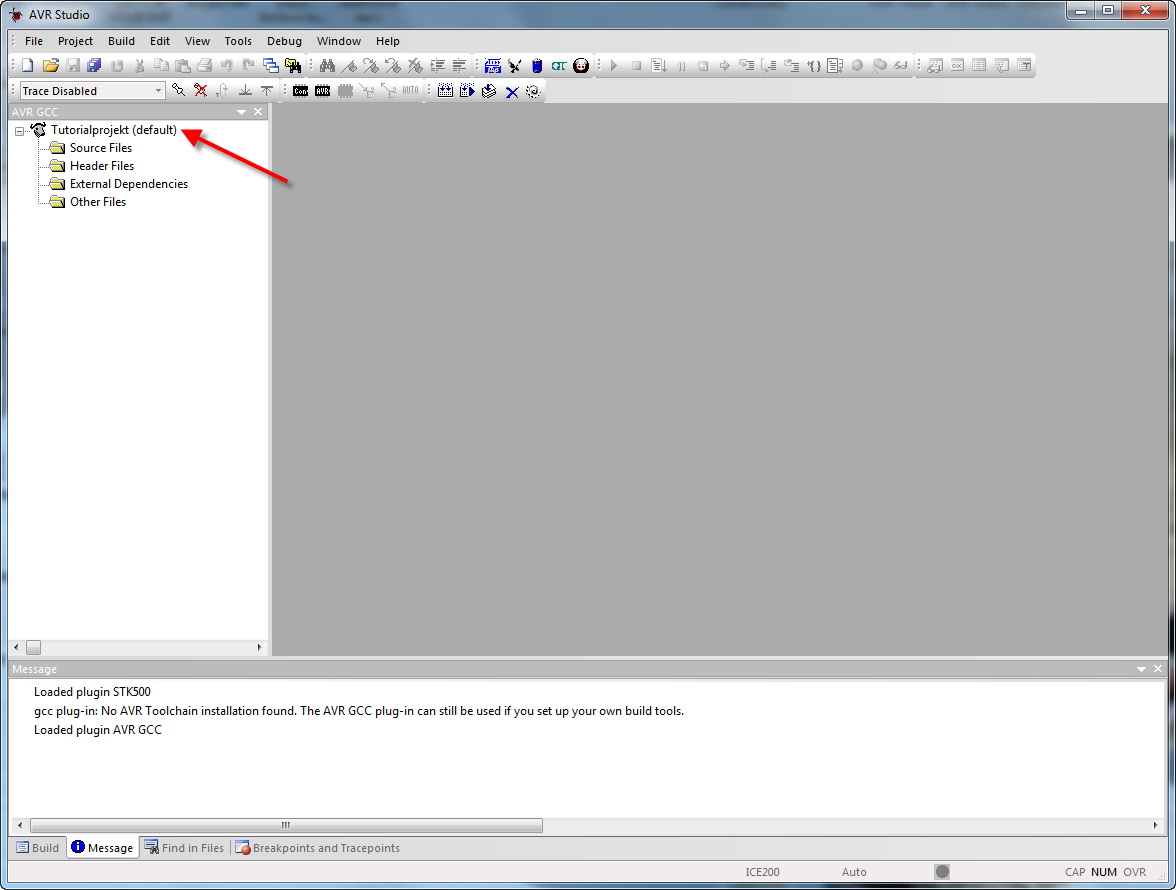
The development environment appears. On the left side you find the project explorer. RMB click on the project name on the top. From the drop down menu you chose
Edit Configuration Options.
|
|
|
The project configuration window appears
|
|
|
Schritt 5: Insert C-Code in new C-file.
|
|
|
Lets create a new .c-file. Do a RMB click on Source Files. In the appearing dialog click on Create new Source File.
|
|
|
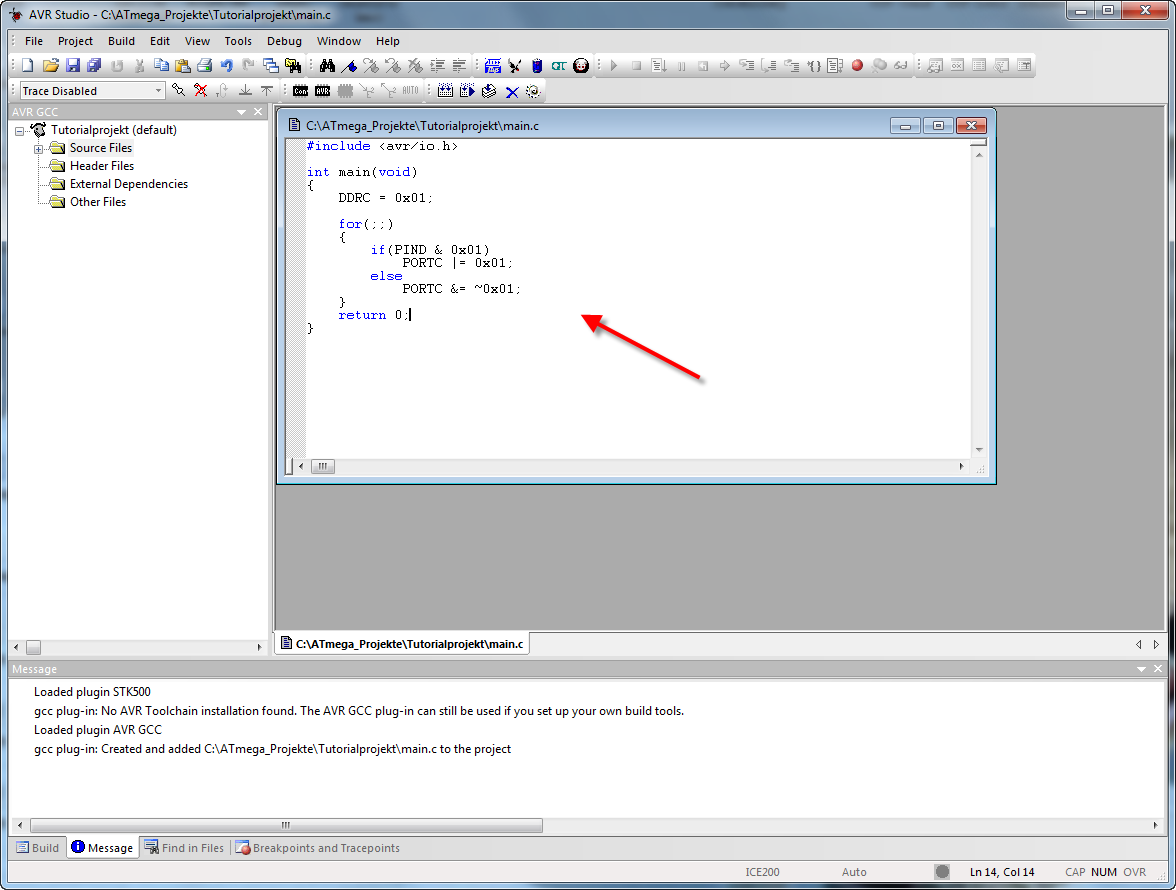
Enter the code from the picture into the file. It's our first test program which reads a switch and sets an LED.
You can also copy the code of the following code window.
|
|
#include <avr/io.h>
int main(void)
{
DDRC = 0x01;
for(;;)
{
if(PIND & 0x01)
PORTC |= 0x01;
else
PORTC &= ~0x01;
}
return 0;
}
|
Step 6: Compile and debug
|
|
|
Then click on Build. Now the program is being compiled.
|
|
|
In the report window on the bottom you can see if the compilation was finished successfully.
If there was an compiling error, you can click on the line in the report and AVR studio shows you in which code line the error has been found.
|
|
|
Step 7: Connect to STK500 and download the code.
|
|
|
Click on Connect
|
|
|
The Select AVR Programmer dialogue appears.
|
|
|
The STK500 ISP Mode with ATmega8 window appears
|
|
|
|
|
|
Stepp 8: Connect the interface cable
|
|
|
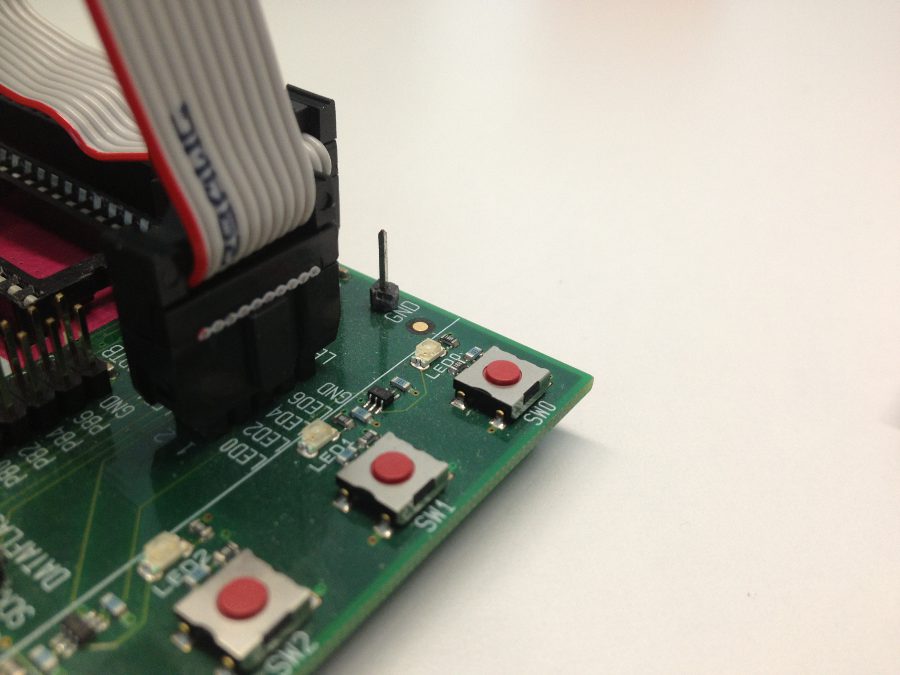
Connect the LED's of the STK500 with Port C and the switches with Port D. Use the two flat cables as shown on the picture.
|
|
|
Step 9: Test the program.
|
|
|
The program reads the switch SW0 and shows its state on LED0.
|
|
|
|
|


